


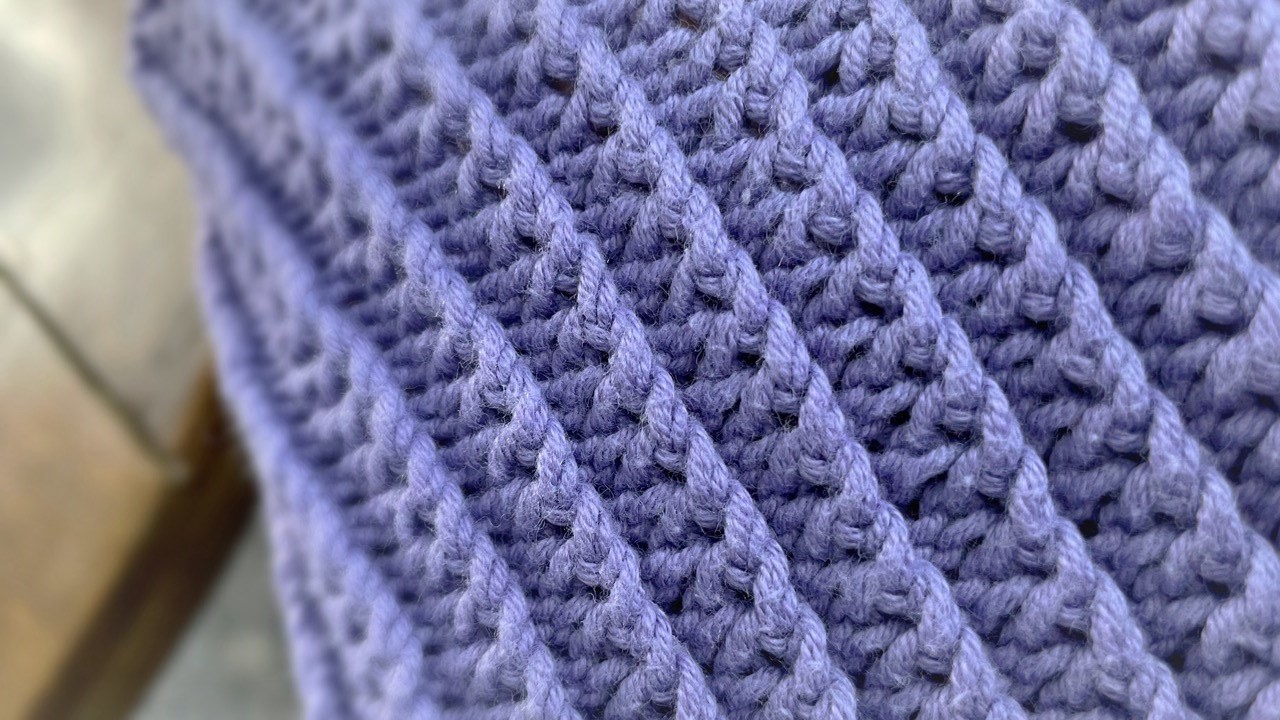
Welcome to WatchKnitting.com! In today’s tutorial, we’re diving into a beautiful, beginner-friendly stitch that’s perfect for scarves, shawls, and more—the Rib Lace Stitch. This stitch combines the delicate texture of lace with the structured look of ribbing, making it a stunning and versatile pattern for all your knitting projects.
What You’ll Need:
- Needles: 4.5 mm (US 7) knitting needles
- Yarn: Bulky yarn (we’re using Loops & Threads yarn for this project)
Why This Pattern Is Great for Beginners:
The Rib Lace Stitch is a simple two-row pattern that’s easy to master. With just a few techniques, you’ll be able to create a beautiful, textured fabric that’s perfect for scarves, blankets, or any project where you want a bit of extra elegance. Whether you’re just starting your knitting journey or looking for a relaxing project to practice, this stitch is a fantastic choice.
Instructions:
Step 1: Cast On
Start by casting on a multiple of 3 stitches, plus 2 additional stitches for the edges. For example, you can cast on 17 stitches (3×5 + 2).
Step 2: Row 1 (Right Side)
- Pick up the first stitch without knitting to create a clean edge.
- For the next three stitches, knit one, then purl two.
- Repeat this sequence (knit 1, purl 2) across the row.
- Finish the row by knitting the last stitch.
Step 3: Row 2 (Wrong Side)
- Pick up the first stitch without knitting (as in Row 1).
- For the next two stitches, knit through the back loop to create a twisted stitch.
- Purl one by picking up the strand of yarn below the stitch and purling the two strands together.
- Repeat the sequence (knit through the back loop twice, purl one) across the row.
- Finish by knitting the last stitch.
Step 4: Repeat
Repeat Row 1 and Row 2 until your project reaches the desired length.
Tips for Success:
- Edge Stitches: Remember to knit the first and last stitch of each row to create clean edges.
- Yarn Choice: Finer yarn works great with this stitch as it gives the lacey pattern more definition, but feel free to experiment with other yarn weights depending on your project.
- Practice: If you’re new to knitting, take your time with the knit-through-the-back-loop technique. It may feel tricky at first, but it’ll become easier with practice!
Why You’ll Love This Pattern:
The Rib Lace Stitch is a blend of elegance and simplicity. It’s perfect for knitting something cozy like a scarf, but also adds a touch of sophistication to any project. Because of its open and airy texture, it’s a great choice for lightweight shawls and wraps too.
Plus, it’s an ideal pattern for beginners looking to expand their skills. Once you get the hang of the basic stitches, you can easily modify it for other projects or even use it in combination with other patterns.


Leave a Reply