


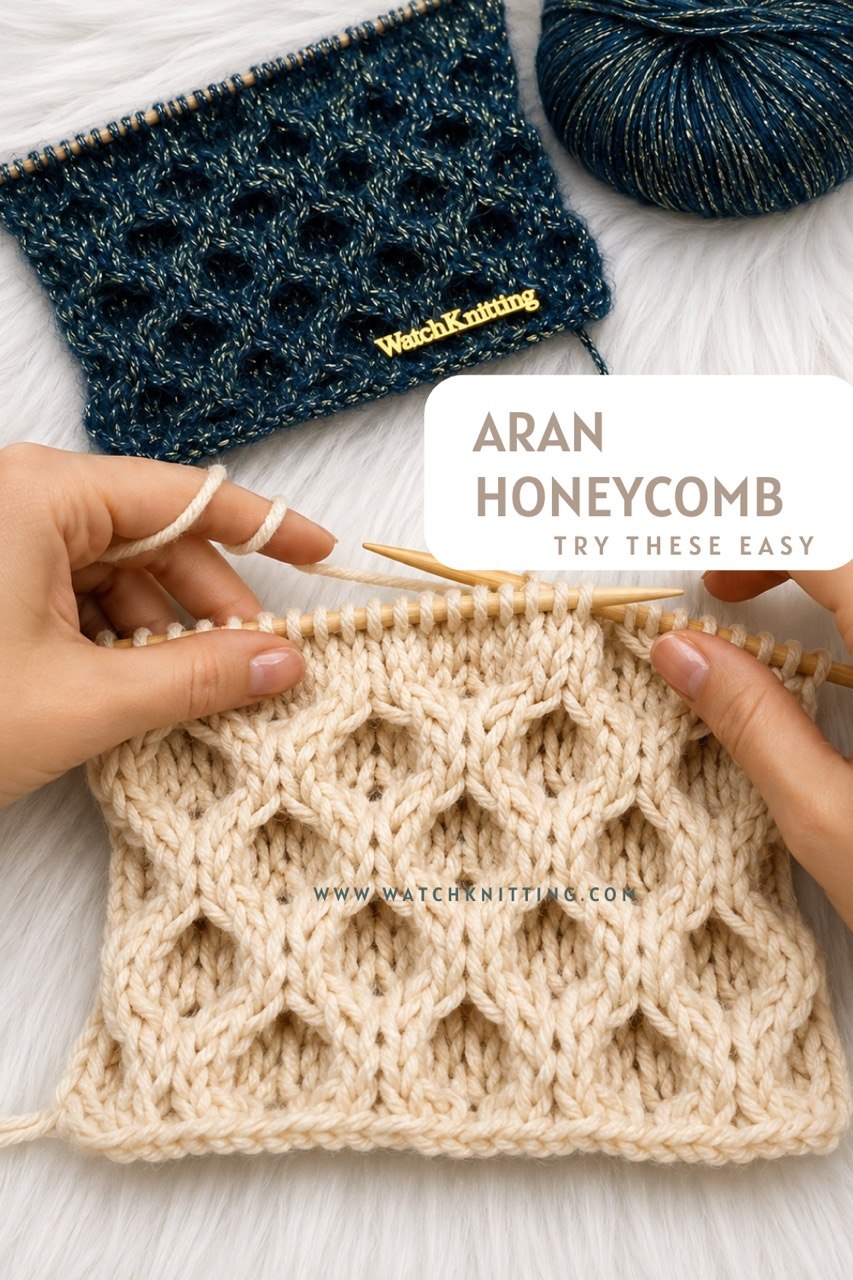
The Aran Honeycomb Stitch is one of those beautiful classic knitting patterns that looks much more difficult than it really is. With its rich raised texture and timeless look, it is perfect for adding depth and interest to your handmade projects.
Even though the finished fabric looks detailed and impressive, this stitch is very beginner friendly. The full repeat is 8 rows, but the actual shaping happens in only 2 pattern rows. The rest are simple knit and purl rows, which makes this pattern easy to remember once you get into the rhythm.
What Can You Make With the Aran Honeycomb Stitch?
This stitch is a great choice for many cozy and textured knitting projects, including:
- Sweaters
- Cardigans
- Cowls
- Hats
- Scarves
- Shawls
- Cushions
- Blankets
It creates a beautiful classic texture that works especially well for projects where you want a warm, handmade, heirloom-style look.
Stitch Multiple
To work this pattern, cast on:
8 stitches + 2 edge stitches
For example, in the tutorial sample, I cast on 18 stitches to show two repeats of the pattern.
Yarn and Needle Ideas
You can use different yarn weights depending on the look you want.
A bulky yarn with larger needles will create a thick, cozy fabric that is perfect for winter accessories and warm garments.
A lighter mohair-style yarn with smaller needles creates a softer, stretchier fabric with a more delicate texture.
Pattern Repeat
The Aran Honeycomb Stitch is worked over an 8-row repeat.
Rows 1, 2, 4, 5, 6, and 8 are simple knit and purl rows.
Rows 3 and 7 are the main pattern rows where the honeycomb shape is created by crossing stitches.
Row-by-Row Instructions
8 stitches + 2 edge stitches
8-row repeat
Row 1,5: Knit all stitches.
Row 2,4,6,8: Purl all stitches.
Row 3: edge, rep (C4R, C4L), edge
Row 7: edge, rep (C4L, C4R), edge
Repeat rows 1–8 for the pattern.
Abbreviations:
C4R: Make a cross over the first 4 stitches to the right by slipping all four stitches to the right needle. Then insert the tip of the left needle into the first two stitches from the back side. While holding those stitches on both needles, pull out the right needle to release the other two stitches from the right needle. Pick them up again from the front side, then place them back onto the left needle before the other two stitches.
C4L: Make a cross over the first 4 stitches to the left by slipping all four stitches to the right needle. Then insert the tip of the left needle into the first two stitches from the front side. While holding those stitches on both needles, pull out the right needle to release the other two stitches from the right needle. Pick them up again from the back side, then place them back onto the left needle before the other two stitches.
Why This Stitch Is Easier Than It Looks
The honeycomb shape is created by crossing groups of stitches, but you do not need to remember a complicated pattern. Once you understand the direction of the crosses, the stitch becomes very repetitive and relaxing.
It is a lovely option for confident beginners who want to try something more textured without feeling overwhelmed.
Final Thoughts
The Aran Honeycomb Stitch is a classic for a reason. It adds beautiful texture to sweaters, hats, cowls, cushions, and many other knitting projects. If you want a stitch that looks impressive but is still easy to follow, this is a wonderful one to try.
Full video tutorial is available above.


Leave a Reply