


 Part 4
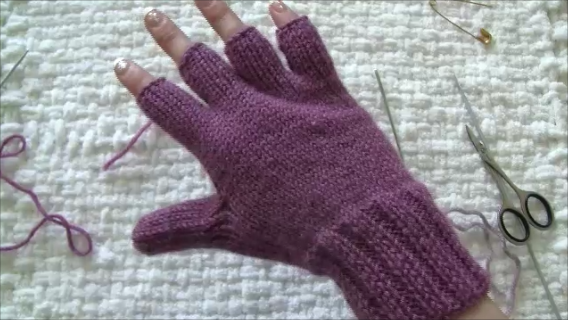
Here I will be working on how you can add thumb to your mittens, where as we marked a row in part 2 of mittens tutorial.
Ripping out scrap yarn:
The first step is to rip out the marked area by removing the scrap yarn from glove. Fold the glove facing the marked area to your face, use the tip of your needle and insert into the stitches made with scarp yarn to unravel them.
Picking up stitches:
Next step you pick up stitches you marked in thumb row. I considered 16 stitches for my thumb, then I have to pick up 16 stitches after ripping out. From your ripped stitches, pick up stitches alternately from bottom and top row starting from right to left in right hand, and left to right in left hand. When you finish picking up stitches, you will have 16 stitches on the needle for thumb and as before you place the yarn beside the first stitch and hold it with your thumb, leave about 5 inch for tail and knit following the previous instruction as (K1, Sl1), if you pick up first stitch from bottom row, and (Sl, K1), if you pick up the first stitch from top row. Then you knit until you reach the full length of your thumb. ( you need to measure your thump and compare it with the piece to make sure it fits, for tips on how to measure thumb click here).
Blocking the thumb:
To bind off the thumb, cut the yarn leaving extra 5 inch on tail, then slide the needle gently to remove it from stitches, then pass the tail through the large eye blunt needle, and pass it through the first stitch connected to the string and through other stitches in row. At the end pull firmly on the working yarn and inset the needle through the small hole to sent it to the inside. Turn the inside out and again pull the string firmly. Insert the tip of your needle into the stitches nearby to secure the tail.
You also need to cover up the gap for the starting point where we started thumb by using that extra tail left in the beginning like what we did for other finger’s gap.
Now your glove is ready. You only need to hide the extra tails and stitch the seaming line for the cuff . You can use the extra tail left in the beginning of row 1 to stitch the seaming line.
If you wanna go further and make a flip cup mitten for your gloves, go to the next part on adding cup to your mittens.
What is next:
Part 5: how to make flip cups and finishing
Other links:
Part 1: how to start gloves
Part 2: marking the thumb line
Part 3: how to make fingers


Leave a Reply