


 Part 5
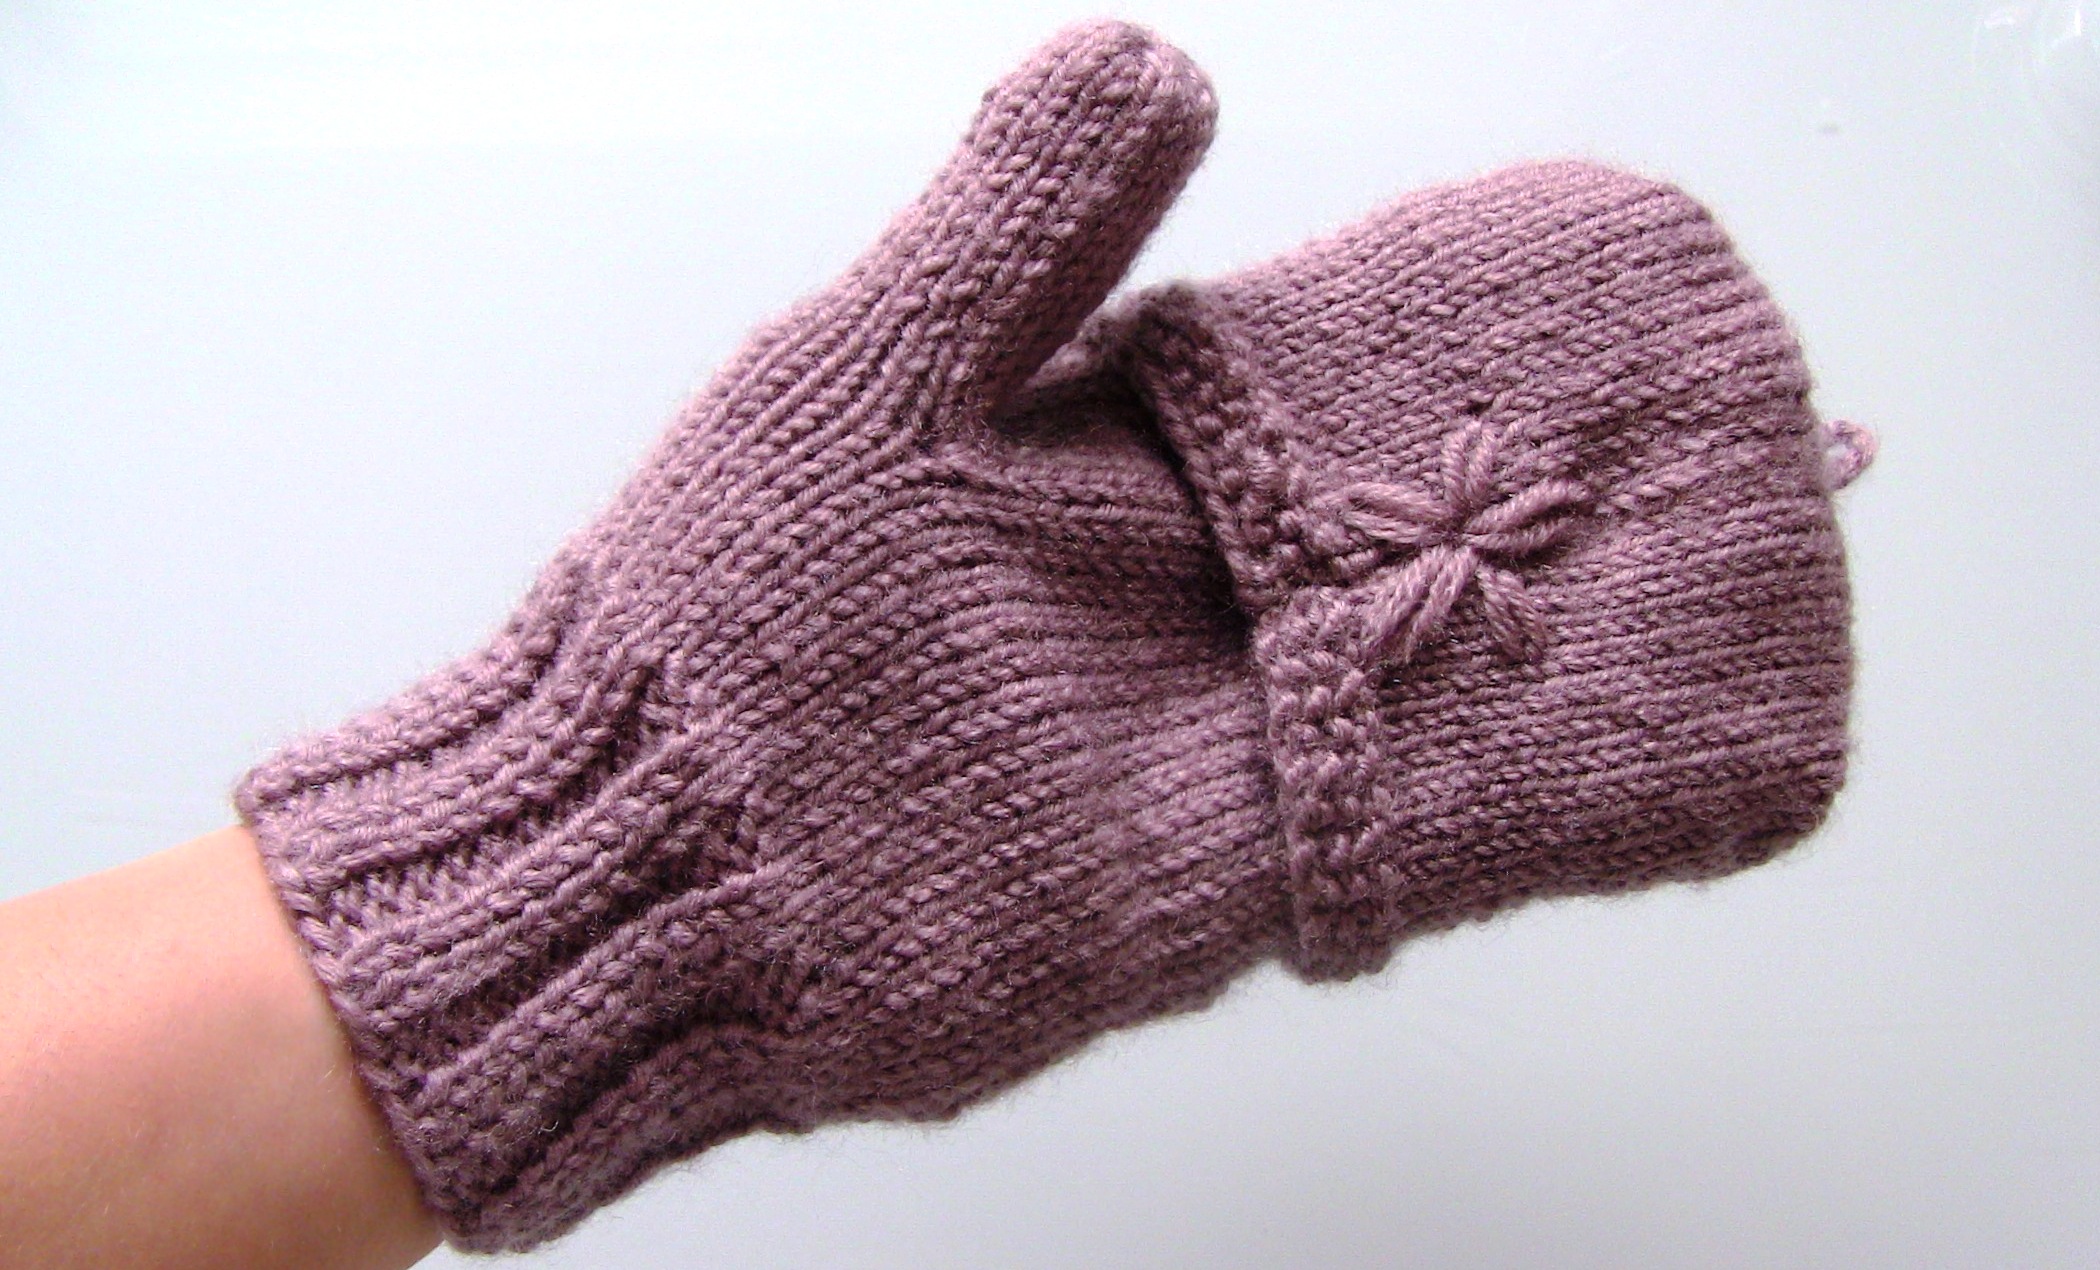
In this part I will show how you can add flip cups to your gloves.
Picking up stitches:
In the first step you need to take stitches from glove to make a flip cups. You will pick up stitches from outer side of the glove somewhere between thumb and fingers.
In right hand: turn the glove to have the thump facing back, but to your right.
In left hand: turn the glove to have the thump facing back, but to your left.
Then identify a horizontal row in the middle of fingers and thumb, then pick up stitches by identifying the front of the stitch which lies to the right of the “V”. Moving your needle from right to left, slip the front of the stitch on to your needle.
In my example, I have started my glove with 48 stitches in the beginning and then I fold it in half, so I am expecting to get 24 stitches in my needle.
Adding new stitches:
Put these picked up stitches aside for now and get the other needle and cast on 16 stitches for small glove, or (18/20/22) for (M/L/XL).
Now we are going to connect these two parts together. For that, having the needle with new stitches to your right hand, start knitting the picked up stitches from the other needle using the working yarn from right needle. At the end of the row, again you need to add another set of stitches as the same number as beginning by casting on with”single cast on method“.
Working on cup:
For the first couple of rows you do rib stitch for the 16 stitches in sides (that prevents your edge from curling), and for the middle part you can do any stitch you like. Here I am sharing the instruction I did for my mittens working on cable stitch for middle part and seed stitch for sides, in the first couple of rows.
I did 5 rows with seed stitches for 16 stitches in sides and stockinette stitch for the middle part. Then in row 6, I converted to stockinette stitch for sides and cable stitch for middle part. I did two cables; one in row 6 and one in row 12. I converted to loop technique after row 13, but I continued to purl two stitches in sides for my cable stitches even after converting to loop technique for about 3 inch.
Instruction for cable stitch and seed stitch:
Row1) Sl1, rep*(K1, P1) for 14 sts*, K1, P24, rep*(K1, P1)for 16 sts*
Row2) Sl1, rep*(K1, P1) for 14 sts*, K1, K24, rep*(K1, P1)for 16 sts*
Row3) Sl1, rep*(K1, P1) for 14 sts*, K1, P24, rep*(K1, P1)for 16 sts*
Row4) Sl1, rep*(K1, P1) for 14 sts*, K1, K7, P2, K6, P2, K7, rep*(K1, P1)for 16 sts*
Row5) Sl1, rep*(K1, P1) for 14 sts*, K1, P7, K2, P6, K2, P7, rep*(K1, P1)for 16 sts*
Row6) Sl1, K22, P2, 3/3LC*, P2, K23
Row7,9,11) Sl1, P22, K2, P6, K2, P23
Row8,10) Sl1, K22, P2, K6, P2, K23
Row12) Sl1, K22, P2, 3/3LC*, P2, K23
Row13) Sl1, P22, K2, P6, K2, P23
Note:
3/3LC*: Slip 3 sts to CN and hold in front, K3, then K3 from CN
(get the spare needle, transfer three stitches from left needle to the spare needle, knit next three stitches from left needle, slip back three stitches from spare needle to left needle, knit them
Loop technique:
slip 28 stitches to the spare needle, fold in half, slip one stitch from each needle at a time by slipping the first stitch from back needle. Note: with even number of stitches, if you slip the first stitch from the front needle, then the instruction for all following rows will be knit one, slip one, if you slip the first stitch from the back needle, then the instruction for all following rows will be slip one, knit one. Here I slip my first stitch from back needle, then in the following rows my instruction will be slip one, knit one.
For two purl stitches in sides of cable stitch you would do (Sl1, P1)
Finishing:
When the piece measures the length of your middle finger, from 1 inch below it until the tip, then you can block the cup.
Blocking:
For blocking, you would use the same technique used for fingers.
Gently slide the needle from stitches and fall apart two sides of the cup. Identify the working yarn position and from opposite side of that slip stitches to the needle (the working yarn should be at the beginning of the row). Turn it the other way, and slip the other half of stitches to the stitch holder. Bind off stitches in needle. slip another half of stitches from stitch holder to the working needle and bind them off.
Cut the yarn a little long because you will need to attach parts with it. Pass the string through the loop to tie it and pass it through the large eye blunt needle, turn inside out to attach sides. While the string stays in the middle, stitch toward one side to reach to the end. At the end, pinch the corner of cup by placing your point finger on seam line and your thump below it to create two corners. Stitch in a horizontal line perpendicular to the seam line and make a small triangle, this will give your cup a little depth. After having enough stitches in that side, work toward the other end. In the middle you need to leave a small gap for about 1 cm for button loop. Repeat the same thing for the other end.
button loop:
For the button loop cut a small piece of yarn, about 10 inch, hold each ends with one hand and then twist it from one side couple of times. Bring both sides together and let it twist naturally, then fold it in half and place it inside the gap. Stitch into it many time to make sure it is secure enough.
At this point you are almost done. You only need to stitch the seam, and hide extra tails and put buttons to finish your mittens.
I hope you enjoyed this tutorial. If you have any comments regarding this tutorial or my other videos feel free to leave me your comments! I will be posting new tutorials soon, stay connected for now!


Leave a Reply