


Alright, let’s talk about how to add a lining to the inside of your knitted hat. It’s a super simple way to make your hat warmer, cozier, and more comfortable. Here’s what you’ll need and how to do it:
What You’ll Need:
- Fabric for the lining: Something soft and warm like fleece or flannel works great.
- Basic sewing supplies: Scissors, thread, needle, pins, and a measuring tape.

Let’s Get Started:
- Measure Your Hat
- First, measure the inside of your hat. You’ll need the circumference of the brim and the height from the brim to the crown.
- Add about an inch to these measurements for seam allowance when cutting your fabric.
- Cut the Fabric
- Fold your fabric in half with the “nice” sides (the side you want to show inside the hat) facing each other.
- Trace your measurements onto the fabric and cut it out.
- Now, take your circumference measurement and divide it by 5. For example, if your circumference is 58 cm, you’ll get 11.6 cm.
- now Fold the fabric vertically in half and make a small vertical cut about 3 cm (or 2 inches) along the folded edge.
- Next, use your measuring tape to mark the divided circumference measurement (e.g., 11.6 cm) across the top edge of the fabric and make two more small vertical cuts in a row.
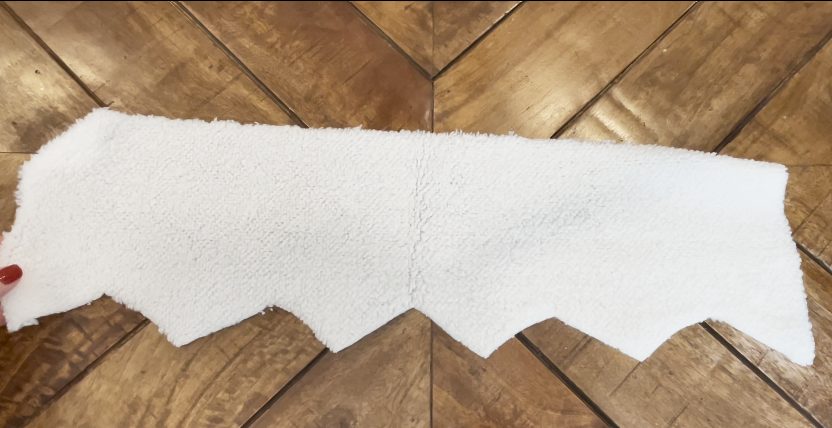
- From these markings, we’re gonna create a crown-shaped fabric by cutting out 5 shallow right triangles from the rectangular piece. Start at the first section and cut a gentle curve downward from one mark to the next, forming a “dip” or notch. Repeat this process for all the sections, connecting the points to create a wave-like pattern. For the two edge sections, cut a single shallow curve to shape the fabric’s ends.
- this is the final look you’re gonna get.
- Sew the Lining
- Sew the sides and the top of your fabric together (remember, leave the bottom open!). Use small stitches so it doesn’t come apart later.
- Turn it right side out—it’s starting to look like a lining now!
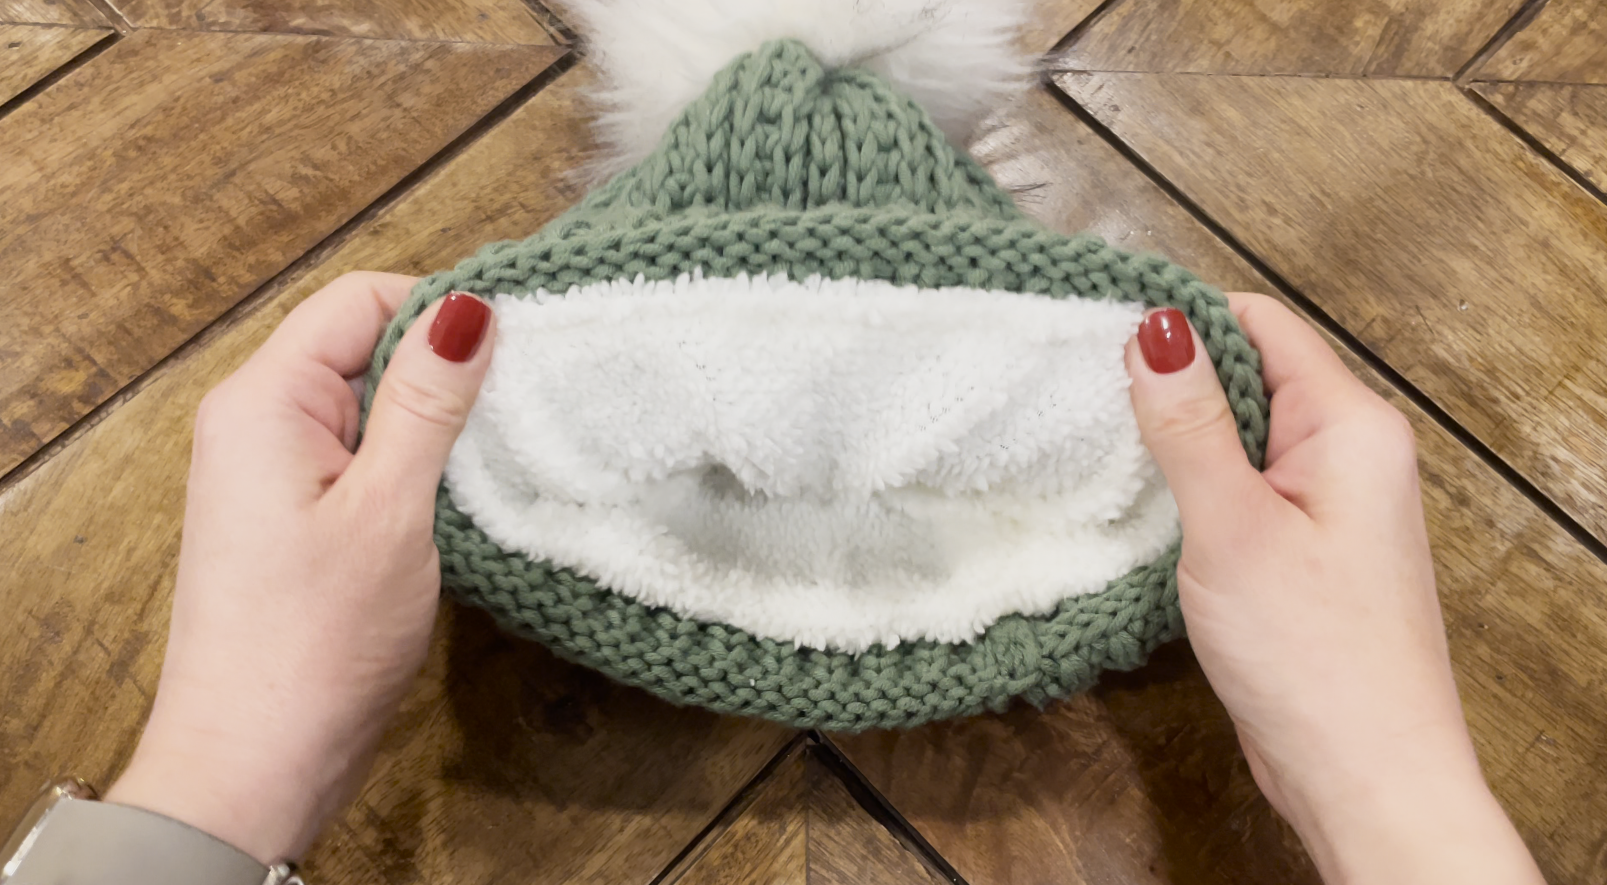
- Attach the Lining
- Slip the lining inside your hat. Make sure the seams of the lining line up nicely with the hat.
- Fold the bottom edge of the lining under about half an inch and pin it just above the brim of the hat, so it won’t peek out.
- Sew It In Place
- Use a simple hand stitch, like a whipstitch or slip stitch, to attach the lining to the hat. Don’t pull the thread too tight—you want the hat to stay stretchy!
- Finish Up
- Once it’s all sewn in, check for any loose spots and secure them. Snip any extra threads, and you’re done!
Now you’ve got a super warm, comfy hat with a nice, clean look on the inside. Perfect for those chilly days! Give it a try, and let me know how it works for you.
Happy crafting!


Leave a Reply