


Hi everyone, and welcome back to WatchKnitting.com! I’m Fariba, and today I’m excited to guide you through two beautiful stitches that resemble the Fisherman’s Stitch and the Shaker Stitch. I’ll also share a handy trick to create reversible fabrics with just one small adjustment. Let’s dive in!
Getting Started
For both patterns, you’ll need to cast on an even number of stitches. Here, I’m casting on 20 stitches using bulky yarn with both my needles. To achieve a more defined fabric, always choose needles at least two sizes smaller than the recommended size for your yarn. Typically, I would recommend 4mm needles. For this demonstration, I’m using 3mm needles instead of 4mm ones.
Foundation Row
The instructions for both patterns start the same. Begin by purling all stitches across the row. For edge stitches, I slip the first stitch at the beginning of each row and knit it at the end of the row. However, on the very first row, I knit it at the beginning. This row serves as the foundation for the pattern. From the next row onward, you’ll repeat the same sequence for all following rows.
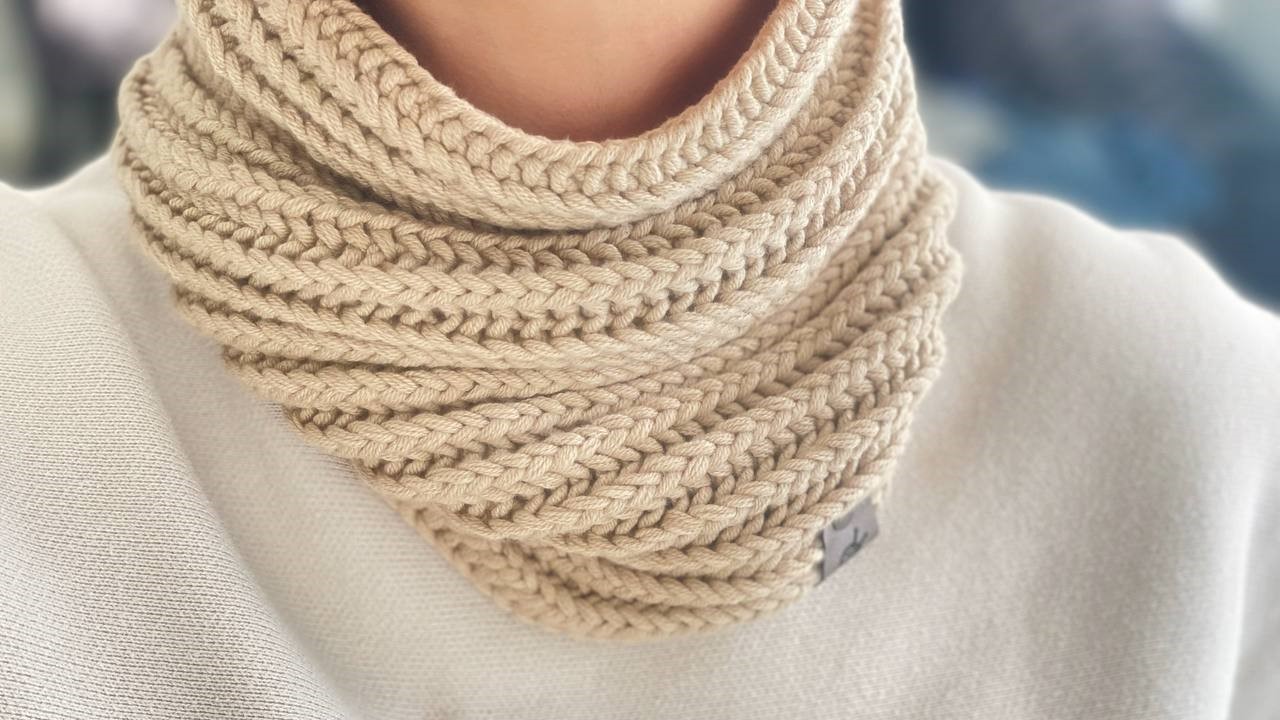
Creating the Fisherman’s Stitch
Now that the base row is ready, let’s create the pattern:
- Slip the edge stitch.
- Purl one stitch.
- Knit one below—this means inserting the tip of your needle into the stitch from the row below and knitting it.
While knitting into the stitch below, make sure to twist the yarn as you pull it through. This is the key point. In continental knitting, you need to wrap the yarn around the needle clockwise to ensure it stays secure and creates proper tension for the stitch.
Initially, I started from scratch to show you the base row, but I found it a bit harder to work the first row, especially while recording the video. So later, I switched to my actual knitting to demonstrate the process more smoothly.
To recap, slip the edge stitch, purl the next stitch as usual, and follow it with knit one below. As you can see, I twisted the yarn. Repeat this sequence of purl 1, knit 1 below for the rest of the row. A helpful tip: gently pull the fabric downward while knitting into the stitch below. This makes it easier to twist the yarn and pull the stitch through smoothly.
Creating the Shaker Stitch
Now, let’s move on to the Shaker Stitch. This stitch is just as squishy as the Fisherman’s Stitch but has a slightly softer texture:
- Slip the edge stitch.
- Purl one stitch.
- Knit one below—but this time, do not twist the yarn as you knit into the stitch below.
This is the key point: the pattern for both stitches involves repeating “purl 1, knit 1 below,” but in the Fisherman’s Stitch, you twist the yarn, whereas in the Shaker Stitch, you do not. The result is a looser, airier fabric for the Shaker Stitch.
Notes on the Shaker Stitch
As mentioned earlier, there are various instructions for creating the Shaker Stitch, and it is sometimes referred to as the Half Brioche Stitch, which follows different instructions. Regardless of the method, the Shaker Stitch creates a lovely, versatile texture for your projects.
Conclusion
And there you have it—two gorgeous stitches to add to your knitting repertoire! These patterns are perfect for creating cozy, reversible fabrics that will elevate your knitting game. If you found this tutorial helpful, don’t forget to like, subscribe, and share it with your fellow knitters. As always, tag me in your creations—I’d love to see your beautiful projects! Happy knitting, and see you next time on WatchKnitting.com. Bye for now!


Leave a Reply