


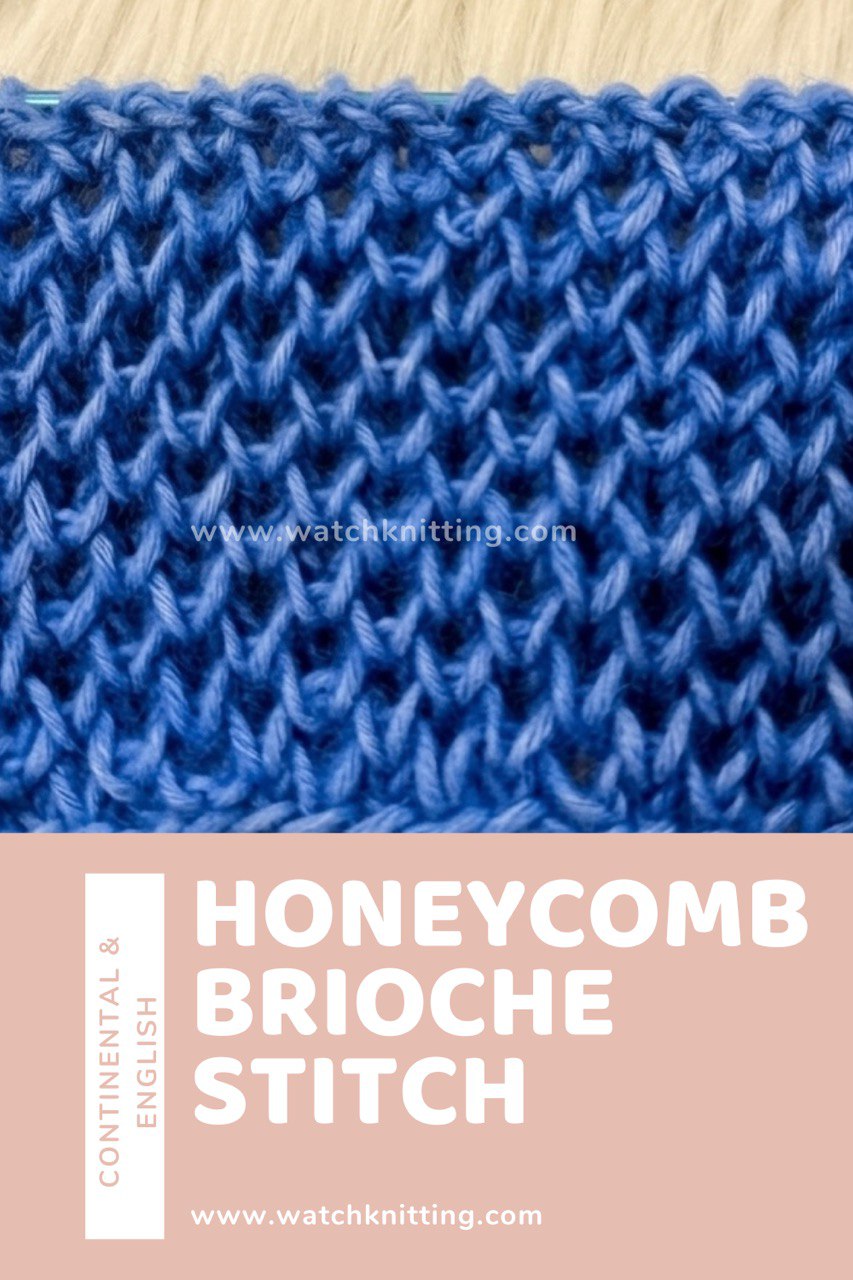
The Honeycomb Brioche Stitch creates a thick, squishy, beautifully textured fabric that looks intricate but is actually very rhythmic once you understand the structure. In this tutorial, I’ll show you how to knit it flat, and how to easily identify your right side and wrong side rows so you never get lost.
This stitch is perfect for scarves, cowls, sweaters, cardigans, and cozy winter accessories.
Yarn & Needles
For best results, use a needle slightly larger than your yarn label recommends.
This helps the fabric stay soft and stretchy instead of tight.
Example:
- Worsted weight yarn
- Needle 0.5–1 mm larger than suggested size
Stitch Multiple
Cast on a multiple of 2 + 1 stitches (odd number of stitches).
Abbreviations
- k = knit
- k1b = knit 1 below (insert needle into the stitch one row below and knit)
- k2tog with lifted strand = lift the loose strand in front of the stitch, knit the stitch, and pull the new stitch through under the lifted strand
- rep = repeat
- edge = slip first stitch purlwise, knit last stitch
Pattern (4-Row Repeat + 1 set up)
Set up row:
knit all the stitches
Row 1 (RS):
edge, rep (k1b, k1), k1b, edge
Row 2 (WS):
edge, rep (k2tog with lifted strand, k1), k2tog with lifted strand, edge
Row 3 (RS):
edge, rep (k1, k1b), k1, edge
Row 4 (WS):
edge, rep (k1, k2tog with lifted strand), k1, edge
Repeat Rows 1–4.
How to Read the Fabric (So You Don’t Get Confused)
This stitch becomes very easy when you understand this simple rule:
Right Side = k1b row
On the right side, you always work knit 1 below on the single stitches.
Wrong Side = k2tog row
On the wrong side, you always lift the strand and work it together (k2tog with lifted strand).
If a stitch looks like it has two bars, just knit it normally.
If it looks like a single stitch, you’ll work into the stitch below on RS rows.
Think of it like this:
- Single stitch → make it double (k1b)
- Double stitch → make it single (k2tog with lifted strand)
That’s the whole rhythm of honeycomb brioche.
Tips for Success
- Gently pull the fabric down when working k1b so you can clearly see the stitch below.
- When lifting the strand, keep it relaxed — don’t tighten it.
- If you lose track of your row, just look at the fabric texture instead of counting rows.
Once you complete a few repeats, you’ll see the beautiful honeycomb texture forming clearly on the right side, with a soft, structured fabric on the wrong side.
In the next tutorial, you can adapt this stitch for working in the round, which follows the same logic with a small adjustment.
Happy knitting! 🧶


Leave a Reply