


Hey everyone, welcome back to Watch Knitting! I’m Fariba, and today I’m going to show you how to create a really unique fabric using a super simple stitch pattern.
This one’s light, airy, and beautifully stretchy — and it works up so quickly that you could easily finish a whole scarf in just one day!
About the Pattern
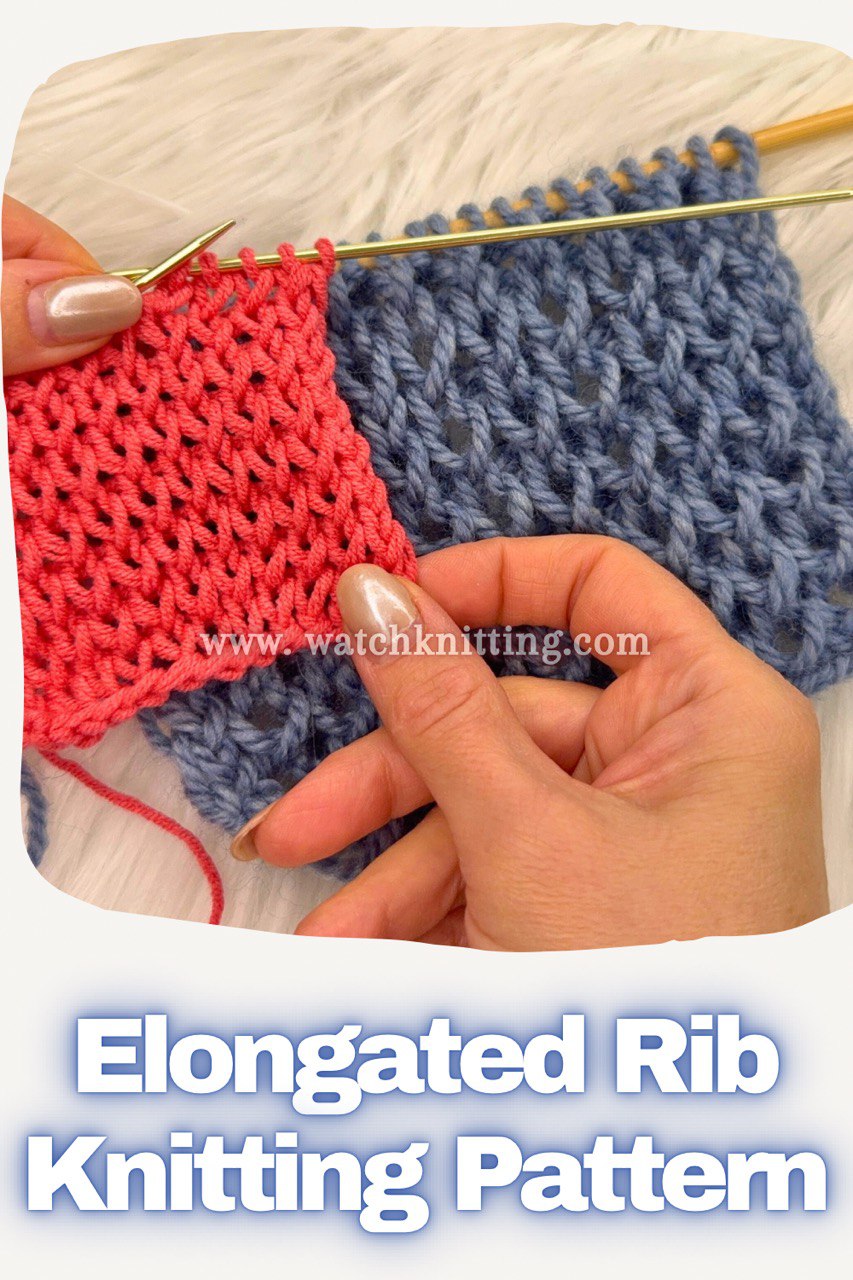
The right side and the back side both look amazing, so you can use either one as the front of your project. The pattern is based on a 1×1 rib with just one small twist that makes it look completely different. Also there is a stockinette version that uses the same technique to create lovely elongated loops for a lacy texture.
Stitch Details
- Pattern type: Rib lace / openwork texture
- Multiple: 2 + 1 stitches (any odd number)
- Repeat: 2 rows
- Yarn & Needles:
- Demo: 13 stitches, worsted weight yarn, 3.5 mm needles
- Alternate sample: thicker yarn with 5.5 mm needles — gives a softer, fluffier, and more open texture
You can start the pattern right from the cast-on edge.
How to Knit the Airy Rib Stitch
Row 1 (WS):
Normally, I slip the first stitch and knit the last one, but for this first row, I knit the edge stitch instead.
Since it’s a rib stitch, the base pattern is purl one, knit one, but before each stitch, make a yarn over.
Here’s the trick:
When you purl, insert your needle purlwise — and instead of wrapping the yarn around as usual, just grab it from the top and pull it through. That’s the little secret that makes this fabric light and textured.
So:
Yarn over → Purl (without wrapping)
Yarn over → Knit as usual
Keep repeating this across the row. If you wrap the yarn for purl stitches, the pattern won’t turn out the same, so pay attention to that detail.
End Row 1 with yarn over, purl one, yarn over, knit one (edge stitch).
Row 2 (RS):
Slip the first stitch, then look for the yarn over — drop it carefully off the needle while keeping tension.
Then:
- Knit the next stitch normally.
- Drop the next yarn over.
- Purl the next stitch (again, without wrapping).
Repeat: Drop yarn over, knit one; drop yarn over, purl one across the row.
That’s all there is to it! The two key points to remember are:
- Make a yarn over before each stitch on Row 1.
- For purl stitches, do not wrap the yarn — just grab it and pull through.
Keep repeating these two rows, and you’ll get a fluffy, airy, and stretchy texture that looks like lace mesh ribbing.
Stockinette Variation
You can also make a stockinette version by alternating one purl row and one knit row. The same yarn-over trick applies — just remember, the yarn overs are always on the purl side.
Yarn over, purl without wrapping — then on the next row, drop the yarn overs and knit normally. This creates an elongated texture that looks delicate and elegant.
Final Look & Ideas
This pattern creates a fabric that’s soft, breathable, and slightly bouncy — perfect for scarves, light sweaters, or openwork shawls.
If you want to experiment, try it with different yarn thicknesses for completely different looks — tighter for structure, or looser for a lace-like drape.
Thanks so much for watching and knitting along! 💛
I hope you found this tutorial helpful. Don’t forget to check out my Ladder Stitch sample for a similar airy effect — it’s worked the same way but with two plain rows between yarn-over rows for a different texture.
Stay tuned for more lace and mesh knitting tutorials, and as always, happy knitting!

Leave a Reply