


Hello friends! Fariba here from the Watch Knitting.
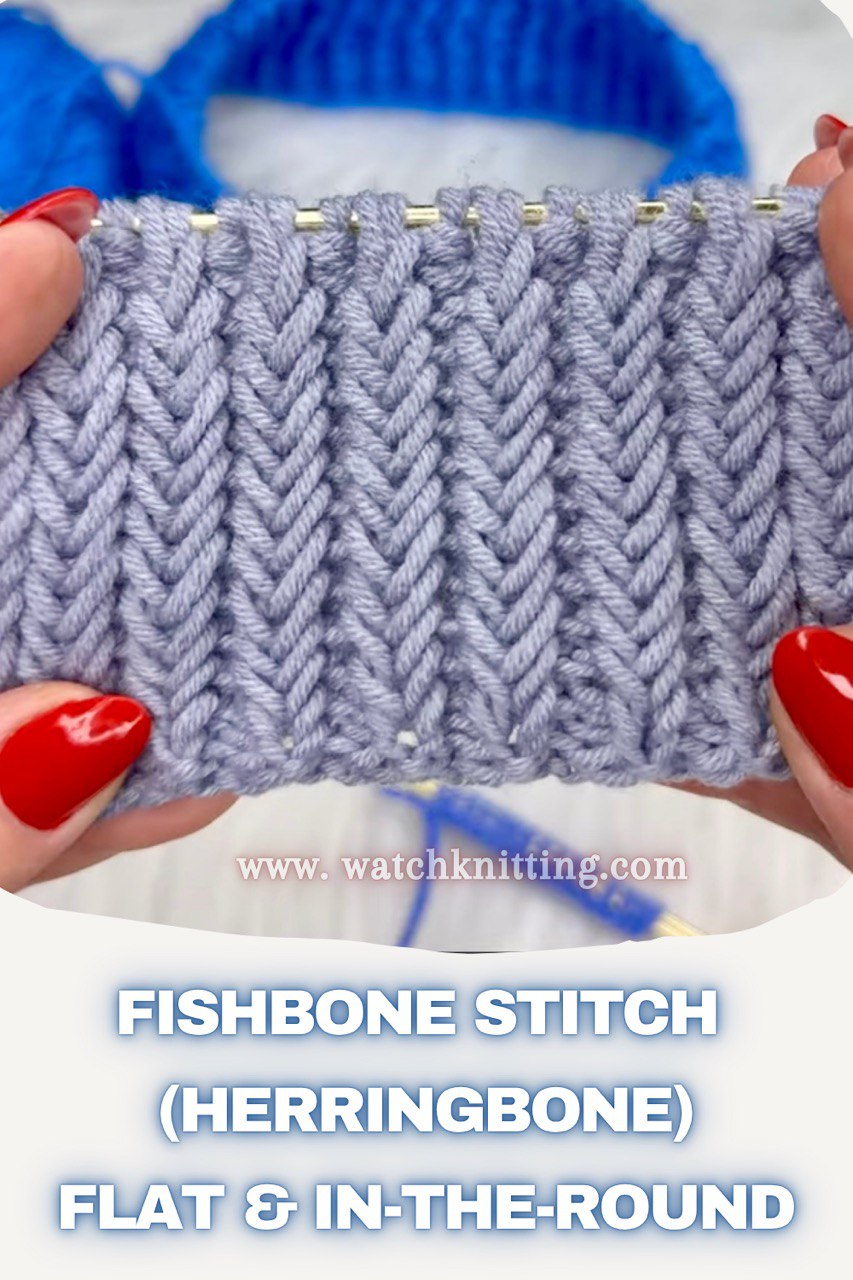
In today’s tutorial, we’re working on the Fishbone stitch, also known as the Herringbone stitch. This beautiful textured pattern is reversible when worked flat, but when worked in the round, it becomes non-reversible — while still keeping the same lovely appearance on the right side.
In this post, I’ll show you both versions:
- Flat knitting
- In-the-round knitting
Let’s get started!
✨ Flat Version
For the flat version, you need to cast on an odd number of stitches.
The Fishbone stitch is a 2-row repeat, but we begin with two setup rows.
🧶 Edge Stitches
I slip the first stitch at the start of every row (for a neat edge), and I knit the last stitch at the end of each row.
🟦 Flat Instructions:
Base Row: Edge, [P1, K1] rep, P1, Edge
Set-up Row: Edge, [PU R leg below & K, Sl1, Rev P1] rep, PU R leg below & K, Edge
Row 1: Edge, [Rev P2tog, PU R leg below & K, Sl1] rep, Rev P2tog, Edge
Row 2: Edge, [PU R leg below & K, Sl1, Rev P2tog] rep, PU R leg below & K, Sl1, Edge
✅ Abbreviations:
- PU R leg below & K = Pick up right leg of stitch below & Knit
- Sl1 = Slip 1
- Rev P1 = Reverse Purl 1 (Eastern purl)
- Rev P2tog = Reverse Purl 2 together
- P tbl = Purl through back loop
- YF = Yarn forward
- rep = Repeat
✨ In-the-Round Version
For circular knitting, you need an even number of stitches, so we slightly adapt the technique.
🟩In-the-Round Instructions:
- Base Rnd: [K1, P1] rep
- Set-up Rnd: [PU R leg below & K, Sl1, Rev P1] rep
- Rnd 1: [K2tog, YF, Sl1, PU below, P tbl] rep
- Rnd 2: [PU R leg below & K, Sl1, Rev P2tog] rep
💬 Final Thoughts
I love the beautiful texture and elasticity of this stitch. It makes a great alternative rib for hats, cuffs, collars, and more. I hope you try both versions and enjoy this pattern as much as I do!
If you have any questions, feel free to comment — and stay tuned for more knitting tutorials!


Leave a Reply