


Welcome back to Watch Knitting!
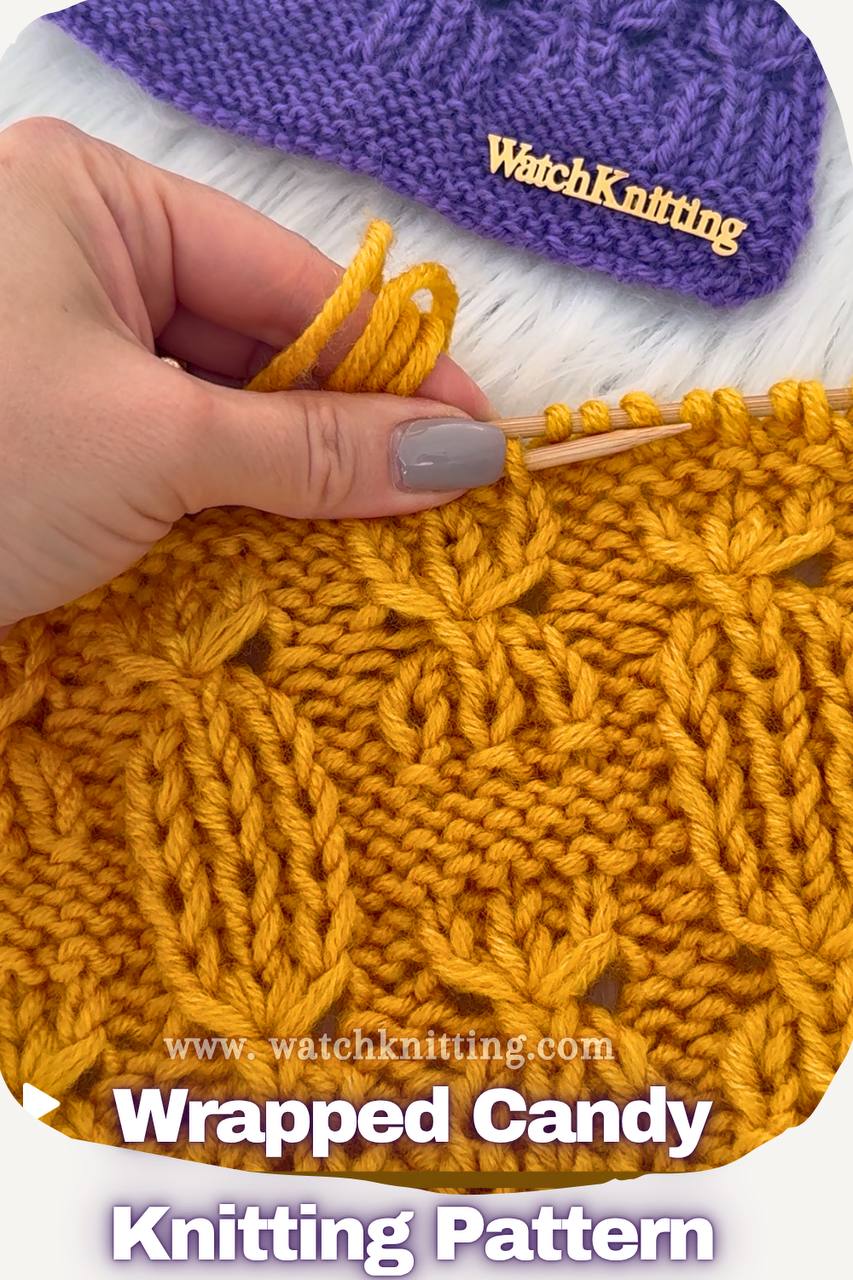
Today I’m sharing the Wrapped Candy Knitting Pattern — a fun and textured design that looks like tiny wrapped candies lined up on vertical rows.
This pattern has a soft, hourglass-inspired texture that stands out beautifully on scarves, blankets, and even sweaters. Despite its intricate look, it’s quite simple once you get the rhythm of the repeats.
🪡 Pattern Details
Multiple: 14 + 9 stitches
Repeat: 28 rows
Sample shown: 23 stitches
Skill level: Confident beginner
Technique: Flat knitting (worked in rows)
Abbreviation used:
C5dec-inc5: decrease 5 stitches, then increase 5 into the same stitch group (creates the wrapped candy effect)
K1b: knit one below

🧵 Instructions
Set-up Row (WS): Purl
Row 1 (RS): edge, rep [(P1, K1b) *3, P1], edge
Row 2 (WS): edge, rep [(K1, P1) *3, K1], edge
Row 3 (RS): (same as Row 1)
Row 4 (WS): (same as Row 2)
Row 5 (RS): edge, rep [(P1, C5dec-inc5, P1)], edge
Row 6 (WS): edge, rep [(K1, P5, K1)], edge
Row 7 (RS): (same as Row 1)
Row 8 (WS): (same as Row 2)
Row 9 (RS): (same as Row 1)
Row 10 (WS): (same as Row 2)
Row 11 (RS): edge, rep [((P1, K1b) *3, P1), P7], (P1, K1b) *3, P1, edge
Row 12 (WS): edge, rep [((K1, P1) *3, K1), K7], (K1, P1) *3, K1, edge
Row 13 (RS): (same as Row 11)
Row 14 (WS): (same as Row 12)
Row 15 (RS): (same as Row 1)
Row 16 (WS): (same as Row 2)
Row 17 (RS): (same as Row 1)
Row 18 (WS): (same as Row 2)
Row 19 (RS): edge, rep [(P1, C5dec-inc5, P1)], edge
Row 20 (WS): edge, rep [(K1, P5, K1)], edge
Row 21 (RS): (same as Row 1)
Row 22 (WS): (same as Row 2)
Row 23 (RS): (same as Row 1)
Row 24 (WS): (same as Row 2)
Row 25 (RS): edge, rep [P7, ((P1, K1b) *3, P1)], P7, edge
Row 26 (WS): edge, rep [K7, ((K1, P1) *3, K1)], K7, edge
Row 27 (RS): (same as Row 25)
Row 28 (WS): (same as Row 26)
Repeat these 28 rows for the pattern.
🧣 Tips & Uses
- The texture looks best in solid or lightly variegated yarns.
- Try it with worsted or DK weight yarn for clear definition.
- Perfect for blankets, scarves, or cozy sweaters.
📺 Watch the Video Tutorial
Follow along step by step and see the pattern form as you knit!


Leave a Reply