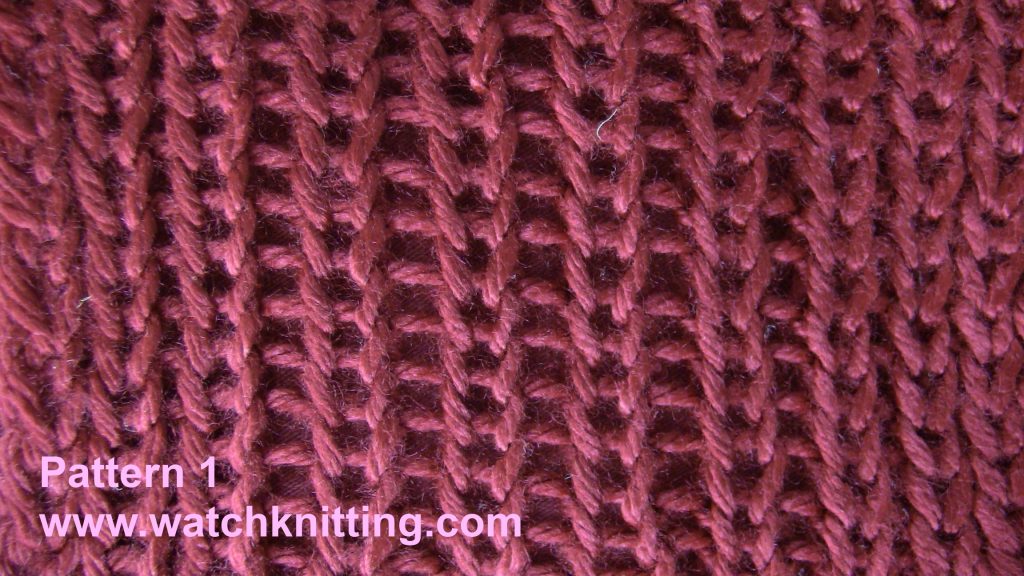
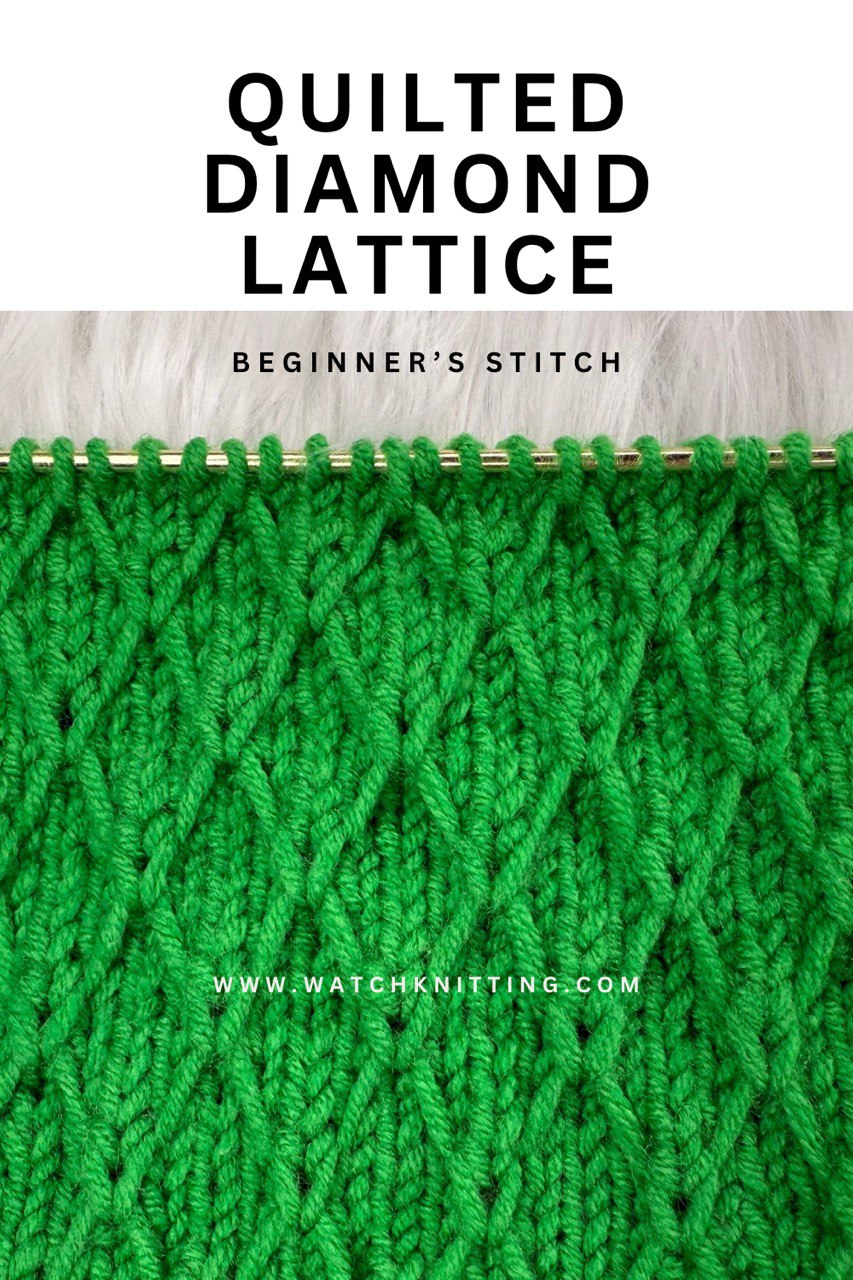
Create a striking diamond lattice texture with this beginner‑friendly stitch. It’s rhythmic, easy to memorize, and perfect for blankets, baby knits, scarves, and cozy throws.
At a Glance
- Skill level: Beginner‑friendly
- Stitch multiple: Multiple of 4 + 3
- Row repeat: 12 rows
- WS rows: All purl
- Curling: Fabric may curl—finish with a light steam to relax
- Sample shown: CO 15 sts (3 repeats) + 2 rows garter as a tidy edge
- Demo tools: Worsted‑weight yarn + 2.5 mm needles (use any yarn/needle size you like)
Abbreviations
- K – knit
- P – purl
- K1b – knit 1 below (insert RN into the stitch one row below the next stitch on LN and knit)
- sl wyif – slip purlwise with yarn in front
- sl3 wyif – slip 3 stitches purlwise with yarn in front
- RS / WS – right side / wrong side
- LN / RN – left needle / right needle
- edge – preferred selvedge: slip first st purlwise, knit last st
Special Move (Diamond Center)
Insert RN under the horizontal strand(s), knit the center stitch, pull it through below the strands, return it to LN, and knit it again.
This creates the raised “quilted” point at the center of each diamond.
Written Instructions (Compact)
Cast on a multiple of 4 + 3 stitches. Optional: work 2 rows garter (K all sts) for a neat edge.
Row 1 (WS): P all sts.
Row 2 (RS): edge, [K1b, sl3 wyif] rep to last st of repeat, K1b, edge.
Row 3 (WS): P all sts.
Row 4 (RS): K all sts.
Row 5 (WS): P all sts.
Row 6 (RS): edge, [K2, (insert RN under horizontal strand(s), K center st, pull through, return to LN, K again), K3] rep, edge.
Row 7 (WS): P all sts.
Row 8 (RS): edge, K2, [K1b, sl3 wyif] rep to last 2 sts of row, K2, edge.
Row 9 (WS): P all sts.
Row 10 (RS): K all sts.
Row 11 (WS): P all sts.
Row 12 (RS): edge, K2, [K2, (insert RN under horizontal strand(s), K center st, pull through, return to LN, K again), K2] rep to last 2 sts of row, K2, edge.
Repeat Rows 1–12 for pattern.
Tension tip: Keep WS rows relaxed and avoid sagging floats on sl3 wyif. Consistent tension makes the diamonds pop evenly.
Step‑by‑Step (Guided Walkthrough)
- Setup: CO your multiple of 4 + 3. Optional: work 2 rows garter.
- Foundation: Work Row 1 (WS) P across.
- Texture bands: Use Row 2 to establish the K1b + sl3 wyif rhythm; Row 4 and Row 10 add breathing space.
- Diamond points: On Row 6 and Row 12, form the quilted point by lifting the center stitch under the horizontal strand(s) and knitting it twice.
- Offset pass: Row 8 shifts the motif for the lattice effect.
- Repeat: Go back to Row 1 and continue to the desired length.
Troubleshooting & Tips
- Edges curling? Add a wider border (6–8 sts of garter or 1×1 rib) and steam block lightly.
- Loose ladders at sl3 wyif? Keep yarn snug in front without pulling; maintain even hand tension.
- Unclear on K1b? Ensure you enter the stitch exactly one row below—not between strands.
Finishing
- Block: Hover steam (or wet block gently) to open the diamonds and smooth curl.
- Care: Follow your yarn’s care label; textured stitches look best after blocking.
Video Tutorial
Watch the full tutorial on the Watch Knitting YouTube channel:
Share & Support
If this pattern helped, please Like, Subscribe, and tap the Bell 🔔 on the video. Share your swatches and tag @WatchKnitting — I’d love to feature your work!
Leave a Reply