


Hello everyone, Fariba here 🤍
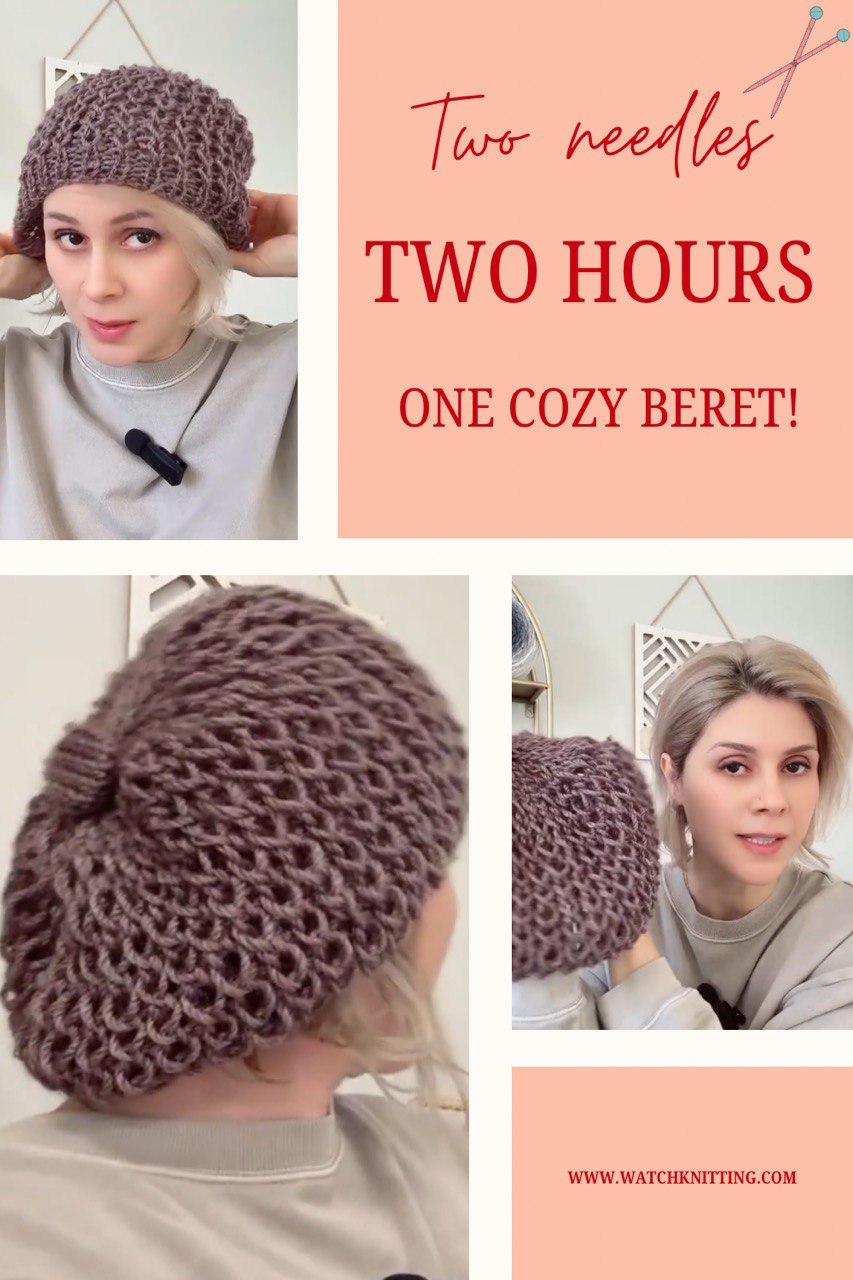
I’m excited to share this hat tutorial with you! This is the same loose, slouchy beret I previously shared using circular needles—and many of you loved the result. After that video, I received so many requests asking if the same hat could be made with straight needles. So here it is! I recorded a full tutorial showing exactly how to knit this hat flat and seam it at the end.
I’ll wear the hat in the video so you can clearly see how it looks from the front and the back. The shape is soft and relaxed, the texture is beautiful, and best of all—it’s super easy and fast.
I finished this hat in just two hours.
If you’re ready, let’s knit it together ✨
Materials
To make this hat, you’ll need:
- Yarn: Worsted weight yarn (Category 4)
I used about 60 grams total for one hat. - Needles: Straight needles, 6.5 mm
(You can also use 6 mm or 7 mm, but don’t go smaller unless you adjust your stitch count.) - 2 stitch markers (for the increase row)
- Measuring tape
- Scissors
- Tapestry needle
- Optional: a bottle cap (for the top detail)
This hat is designed to fit most adults. I’ll also include stitch counts for other sizes below.
Recommended Cast-On Stitch Counts (Straight Needles)
Using 6 mm needles
- Small: 55 stitches
- Medium: 57 stitches
- Large: 59 stitches
Using 6.5 mm needles
- Small: 53 stitches
- Medium: 55 stitches
- Large: 57 stitches
Using 7 mm needles
- Small: 51 stitches
- Medium: 53 stitches
- Large: 55 stitches
Cast-On & Brim (Straight Needles)
For a medium size, cast on 55 stitches using 6.5 mm needles.
These needles are quite thick, so don’t worry—55 stitches is enough. For the cast on tail , with this needle size, every 10 stitches uses roughly 20 cm of the yarn, consider extra 10 cm for easy cast on.
Work a 1×1 rib for the brim:
- Knit 1, Purl 1
- Repeat for 4 rows (about 1 inch)
You can make the brim longer if you like by adding more rows.
Stitch Setup & Increase Row
After finishing the brim, divide your stitches:
- 14 stitches (side)
- 27 stitches (center/front)
- 14 stitches (side)
The center section stays unchanged and sits at the front of the head.
All increases happen on the two side sections only which sit at the back of the head.
Increase Method
- Increase on every other stitch
- Increase 12 stitches on each side
- Total increase: 24 stitches
After completing this single increase row, your total stitch count will be:
➡️ 79 stitches
This is the only increase row. From here on, you’ll work the pattern.
Pattern Overview (2-Row Repeat)
This textured pattern is what makes the hat knit up so fast.
Just two rows = about 1 inch of fabric!
Important Note on Style
Because this hat is worked flat, you must adjust how you knit and purl:
- Knit: Western style – worked through the front loop (even though it’s not the leading leg).
- Purl: Eastern purl (clockwise wrap)
This is essential for creating the large loops and correct texture.
(When worked in the round, this adjustment isn’t needed.)
Pattern Row 1
- Yarn over before every stitch
- Knit stitches: Western knit
- Purl stitches: Eastern purl
- Some increased stitches are worked through the back loop (only in the first pattern row)
Pattern Row 2
- Drop each yarn over
- Knit and purl through the front loop
- Purl remains Eastern
- Knits are worked opposite to the usual stitch mount ( you need to twist stitches to work throught the front loop)
➡️ Repeat Row 1 & Row 2 until the fabric measures 20–22 cm.
Crown Decreases
Once your piece reaches the correct length, it’s time to shape the crown.
Repeat the following:
- Decrease row: Purl 2 together across
- Next row: Knit all stitches plain
Keep alternating these two rows until you have 10 stitches left.
Work one final plain knit row to smooth the top.
Finishing
- Cut the yarn, leaving a long tail
- Thread all remaining stitches onto a tapestry needle
- Pull tight and secure
- Use the same tail to seam the sides together, aligning the brim and pattern carefully
- Weave in all ends neatly
The top is flat and clean, but you can add a decorative detail if you like (I show a simple option using a bottle cap).
Final Notes 🤍
This hat is:
- Beginner-friendly
- Fast to knit
- Perfect for gifts
- Great for using bulky needles and leftover yarn
I truly think once you make one, you’ll want to make another 😄
If you have any questions, leave a comment—I always reply.
And if you knit this hat, I’d love to see your finished piece 🧶✨
Thank you for knitting with me!


Leave a Reply