


Hi everyone, welcome back to the Watch Knitting channel! It’s Fariba here.
Today, I’m going to show you how to knit this beautiful lattice mesh pattern with large, airy loops. It looks intricate, but it’s actually super easy to make — just a simple 4-row repeat.
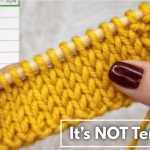
Here’s what the back side looks like: both sides of this pattern look great, so you can use either side for your project.
Materials & Setup
- Yarn: Fine weight yarn (for demo)
- Needles: 2.5 mm
- Cast-on: Multiple of 4 + 2 stitches
- Demo cast-on: 14 stitches
You can start right from the cast-on edge. If you want to knit along, prepare your cast-on and let’s get started!
Pattern Overview
Lattice Mesh Pattern (4-Row Repeat)
Multiple of 4 + 2 sts
Row 1 (RS): edge, rep [K2TOG, D YO, SSK], edge
Row 2 (WS): edge, P1, rep [K1, P1, CR P], K1, P1, P1, edge
Row 3 (RS): edge, YO, rep [SSK, K2TOG, D YO], SSK, K2TOG, YO, edge
Row 4 (WS): edge, P1, rep [CR P, K1, P1], CR P, K1, edge
Abbreviations:
- K = Knit
- P = Purl
- K2TOG = Knit 2 together (right-slanting decrease)
- SSK = Slip, slip, knit (left-slanting decrease)
- YO = Yarn over
- D YO = Double yarn over (wrap yarn twice around needle)
- CR P = Cross 2 purl sts (wrong side)
Step-by-Step Instructions
Row 1 (RS)
- Begin with the edge stitch. For the first row, knit it; from the next row onward, slip it to the right needle without knitting.
- Work over 4 stitches:
- First two stitches — right-slanting decrease (K2TOG)
- Middle stitch — yarn over with double wrap (wrap yarn twice around the needle)
- Last two stitches — left-slanting decrease (SSK through back loop)
Repeat this sequence across the row, finishing with the edge stitch. Pay attention to knitting through the back loop where indicated.
Row 2 (WS)
- Begin with the edge stitch and purl the first single stitch.
- For the yarn overs:
- Knit the first yarn over
- Purl the second yarn over
- For two stitches beside each other, create a cross:
- Transfer both stitches to the right needle
- Pick up the first stitch from the front with the left needle
- Drop the other stitch, then pick it up again
- Place both back on the left needle and purl one by one
Repeat this across the row, alternating knit and purl over yarn overs and crossing stitches where indicated.
Row 3 (RS)
- Slip the edge stitch without knitting.
- Work the same decreases and double yarn overs as in Row 1, offsetting the middle section of the first repeat.
- Repeat the right- and left-slanting decreases, yarn overs, and crossed stitches as demonstrated, ending with the edge stitch.
Row 4 (WS)
- Slip the edge stitch without knitting.
- Yarn overs at the beginning and end — purl them for simplicity.
- Cross two stitches beside each other on the wrong side, following the same technique as Row 2.
- Knit/purl over remaining yarn overs and complete the row with the edge stitch.
Tips & Finishing
- This pattern creates large, airy loops, giving a delicate mesh effect.
- Use smooth yarn to highlight the openwork texture.
- Both sides of the fabric look beautiful, so you can choose which side faces outward in your project.
- Perfect for scarves, decorative panels, or layering in garments.
This lattice mesh pattern is easy, elegant, and visually stunning. I hope you enjoyed this tutorial — stay tuned for more knitting patterns from my channel, and don’t forget to subscribe if you haven’t yet!
Happy knitting! 🧶✨


Leave a Reply