


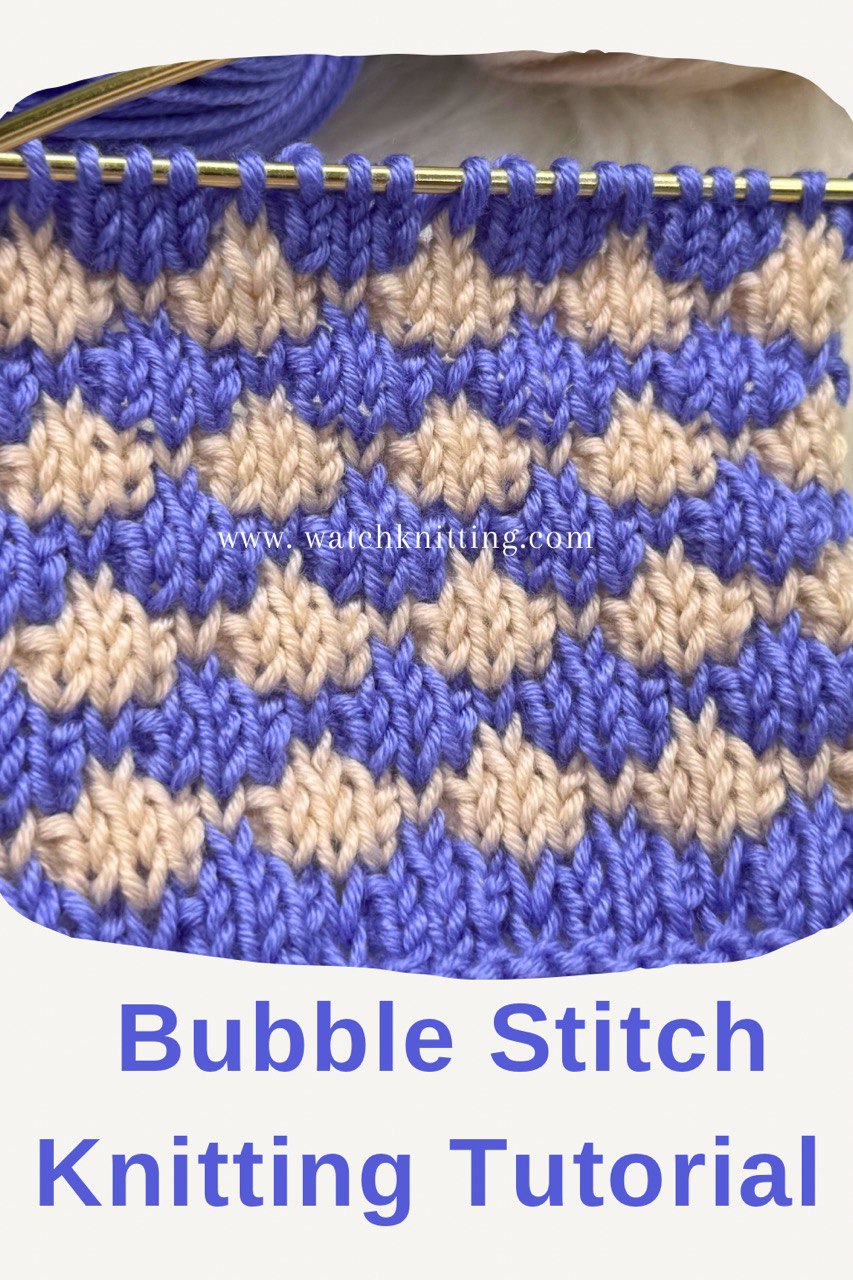
Hello friends, Fariba here! Today I’m excited to share one of the most popular and fun stitch patterns—the Bubble Stitch. This textured design creates charming raised bubbles on your fabric and works beautifully in both single-color and two-color projects. It’s beginner-friendly and perfect for blankets, scarves, cardigans, cowls, and more.
You can experiment with two colors like I did in my sample, or keep it simple with one. Either way, it’s a fun and easy stitch that adds texture and style to any project.
Materials
- Yarn: Fine weight yarn
- Needles: 2.5 mm
- Cast-on: Multiple of 4 stitches + 5
Bubble Stitch Row Guide
Here’s the stitch chart for the pattern repeat. The full design is worked over 8 rows:
Row 1 (WS): edge, rep [P3, SL1YO], P3, edge
Row 2 (RS): edge, rep [K3, SL1YO], K3, edge
Row 3 (WS): edge, rep [P3, SL1YO], P3, edge
Row 4 (RS): edge, rep [K3, K4tog], K3, edge
Row 5 (WS): edge, P1, rep [SL1YO, P3], SL1YO, P1, edge
Row 6 (RS): edge, K1, rep [SL1YO, K3], SL1YO, K1, edge
Row 7 (WS): edge, P1, rep [SL1YO, P3], SL1YO, P1, edge
Row 8 (RS): edge, K1, rep [K4tog, K3], K4tog, K1, edge
Repeat these 8 rows for the full pattern.
Step-by-Step Instructions
- Row 1 (WS): Begin with your edge stitch. Purl 3 stitches, slip 1 yarn over (SL1YO), and repeat across the row. End with 3 purl stitches and the edge stitch.
- Row 2 (RS): Knit 3 stitches, SL1YO, repeat across the row, finishing with 3 knit stitches and the edge stitch.
- Row 3 (WS): Same as Row 1.
- Row 4 (RS): Shape the bubbles: Knit 3, then knit 4 stitches together (K4tog), repeat across the row, and end with 3 knit stitches and edge stitch.
- Row 5 (WS): Begin with P1, then repeat [SL1YO, P3], finish with SL1YO, P1, and edge.
- Row 6 (RS): Begin with K1, repeat [SL1YO, K3], finish with SL1YO, K1, edge.
- Row 7 (WS): Same as Row 5.
- Row 8 (RS): Begin with K1, repeat [K4tog, K3], finish with K4tog, K1, and edge stitch.
Tips & Tricks
- Adjust the stitch tension to make your bubbles slightly bigger or smaller.
- When working two colors, hold the previous yarn along the edge and switch colors as desired.
- The edge stitches help maintain a neat border while knitting.
Why You’ll Love This Pattern
- Beginner-friendly and easy to memorize
- Creates a beautiful 3D texture
- Works for a variety of projects—blankets, scarves, cardigans, and more
- Looks great in single or two-color versions
More Free Tutorials You’ll Enjoy
Happy knitting! Don’t forget to share your projects and tag us if you try this bubble stitch pattern.


Leave a Reply