


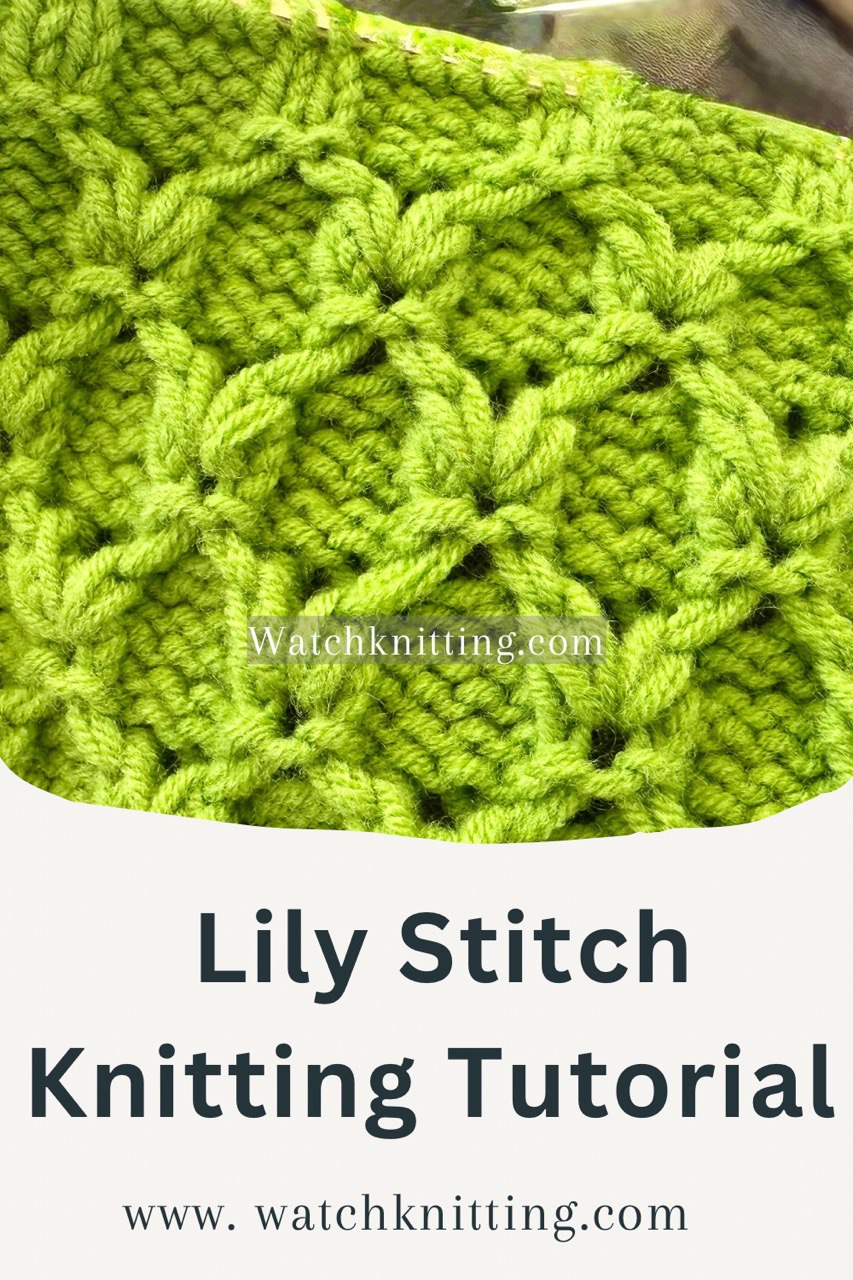
Hello friends, Fariba here! Today, I’m excited to share with you a beautiful Lily Stitch knitting pattern. This textured design looks like lilies spreading across the fabric and is perfect for scarves, blankets, or any project where you want a delicate floral touch.
The stitch is based on a 12-row repeat worked over a multiple of 6 + 2 stitches. The first six rows establish the lilies, and the next six rows offset the pattern, creating a flowing, all-over design.
🧶 Materials
- Yarn: Worsted weight
- Needles: 2.5 mm
- Cast on: Multiple of 6 + 2 stitches (I cast on 20 stitches to show three repeats)
📏 Pattern Notes
- The setup row creates a base and is not repeated.
- Rows 1–6 form the main lily motif.
- Rows 7–12 shift the motif to create an offset effect.
- Repeat Rows 1–12 for the full pattern.
📝 Written Instructions
Setup Row (WS): edge, rep [K1, P1], edge
Row 1, 3 (RS): edge, rep [P2, K2, P2], edge
Row 2, 4 (WS): edge, rep [K2, P2, K2], edge
Row 5 (RS): edge, rep [P2, (K4B Loop, K2TOG) ×2, P2], edge
Row 6 (WS): edge, rep [C3rdB-R, C3rdB-L], P1, edge
Row 7, 9 (RS): edge, K1, P2, rep [P2, K2, P2], P2, K1, edge
Row 8, 10 (WS): edge, P1, K2, rep [K2, P2, K2], K2, P1, edge
Row 11 (RS): edge, K1, P2, rep [P2, (K4B Loop, K2TOG) ×2, P2], P2, K1, edge
Row 12 (WS): edge, P1, K2, rep [C3rdB-R, C3rdB-L], K2, P1, edge
👉 Repeat Rows 1–12 for the pattern.
🔑 Special Stitches & Abbreviations
- K4B Loop: Insert needle between two knit stitches 4 rows below, draw up a loop, place it on the left needle, then knit together with the next stitch.
- C3rdB-R (Cross 3rd Behind Right): Slip 3 stitches to the right needle. Drop the 3rd stitch behind, return the first 2 stitches to the left needle, pick up the dropped stitch from the back, place it on the left needle, then knit all 3 stitches one by one.
- C3rdB-L (Cross 3rd Behind Left): Slip 3 stitches to the right needle. Drop the first 2 stitches in front, pick up the 3rd stitch from the back, return dropped stitches to the left needle, place all back, then knit all 3 stitches one by one.
- Edge: Pick up the first stitch and knit the last stitch.
📸 Visual Result
After completing a few repeats, the fabric blooms into a textured design resembling rows of lilies. The offset rows make the pattern flow continuously, giving it a sophisticated look.
🎥 Video Tutorial
I demonstrate the first 7 rows step by step in my YouTube tutorial, so you can follow along visually. The rest of the rows are easy to catch once you see the rhythm of the stitches.
🌷 Final Thoughts
The Lily Stitch is a beautiful, structured yet delicate knitting pattern. Once you get the hang of the special stitches, it becomes very fun and rhythmic. Try it out in different yarns for scarves, blankets, or even sweaters for a lovely floral effect.
Happy Knitting! 💜


Leave a Reply