


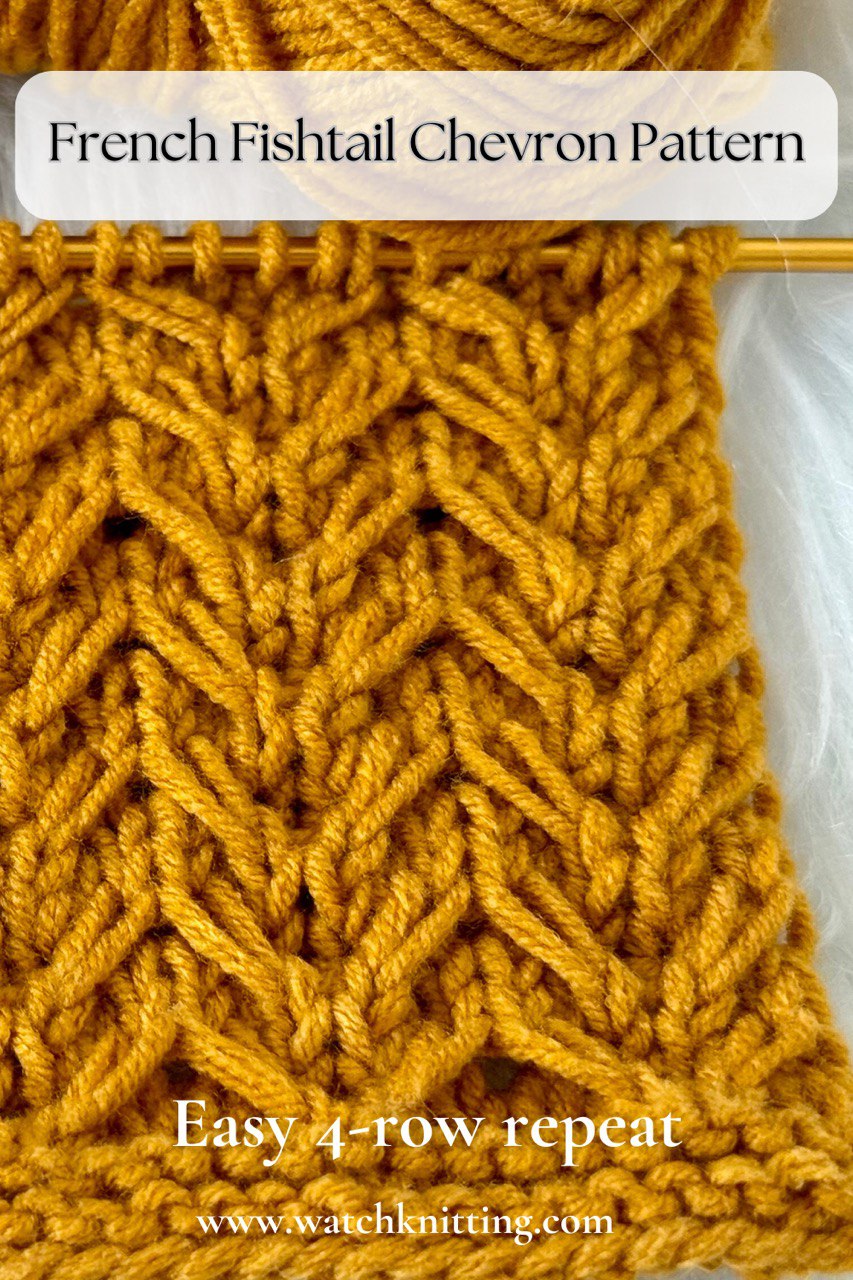
The French Fishtail Chevron Stitch is a beautifully textured pattern that creates a braided chevron effect. It’s easy to knit, totally beginner-friendly, and perfect for scarves, sweaters, blankets, cardigans, and more.
This stitch works up quickly in just a 4-row repeat and is based on a multiple of 6 stitches + 2.
📌 Materials Used in Tutorial
- Worsted-weight yarn
- 2.5 mm knitting needles
Abbreviations
- P – Purl
- K – Knit
- DWP2 – Double wrap purl 2 stitches (purl into the stitch twice before dropping off)
- SL2 – Slip 2 stitches purlwise
- C3R – Cross long stitch over 2 stitches to the right
- C3L – Cross long stitch over 2 stitches to the left
- Edge – Slip 1 at beginning, K1 at end
Pattern Instructions
- Row 1 (WS): edge, [P2, DWP2, P2], edge
- Row 2 (RS): edge, [K2, SL2, K2], edge
- Row 3 (WS): edge, [P2, SL2, P2], edge
- Row 4 (RS): edge, [C3R, C3L], edge
Repeat Rows 1–4 for the pattern.
Tips
- The pattern starts on the wrong side and forms texture on the right side.
- Keep your edges neat by slipping the first stitch and knitting the last stitch on every row.
- You can adapt this stitch to any yarn or needle size depending on your project.
Uses
This stitch looks beautiful in:
- ❄️ Cozy scarves & wraps
- 🧥 Textured cardigans & sweaters
- 🛋️ Home décor projects like throws or cushion covers
✨ Give this stitch a try and bring a touch of elegance to your knitting projects!


Leave a Reply